DE10-Nano: building the SD card image to run "Hello-World!"
Introduction
In my bare-metal C guide, we covered a GUI based way (Eclipse plus development tools) to develop and debug embedded C programs. That is great for the development stages, but for the final stage, we want our program to boot standalone on the DE10-Nano board. The HPS boot ROM controls the startup on the HPS side, it provides these modes, selectable by the BSEL[2:0] switches (Boot Select):
| HPS boot source | Switch |
|---|---|
| HPS boot from FPGA (OCRAM via H2F bridge) | BSEL[2:0] = 001 |
| HPS boot from 1.8V NAND flash | BSEL[2:0] = 010 |
| HPS boot from 3.3V NAND flash | BSEL[2:0] = 011 |
| HPS boot from 1.8V SD card flash | BSEL[2:0] = 100 |
| HPS boot from 3.3V SD card flash | BSEL[2:0] = 101 |
| HPS boot from 1.8V QSPI flash | BSEL[2:0] = 110 |
| HPS boot from 3.3V QSPI flash | BSEL[2:0] = 111 |
The BSEL[2:0] are pins of the Cyclone V SoC FPGA IC, normally wired to a multi DIP switch or jumper headers, but on the DE10-Nano board two of the pins are wired to pullup resistors and one to a pulldown resistor, they are permanently wired for BSEL[2:0] = 101 (boot from SD card).
Boot from FPGA (FPGA embedded RAM via H2F bridge)
Booting from the FPGA is actually an indirect method to boot the HPS. To use this mode, the switches need to be set to BSEL = 001, but alternatively, they can be set to boot from SD card mode, then we can trigger an error to fallback to boot from FPGA. The fallback is decided by the boot ROM error handler, unfortunately it is NOT triggered by simply having no card in the slot. In this case you need a card with a partition table (i.e. partition signature 0x55AA) but without an A2 partition.
The boot from FPGA process is as follows, on startup (or after a fallback), the Cyclone V SoC FPGA will read from the on-board serial flash (an EPCS chip wired to the FPGA side) or programmed through JTAG to configure the FPGA, then your FPGA configuration starts, fills the FPGA memory block(s) (FPGA Embedded Memory) with initial HPS binary program, then asserts a ready signal. When the waiting boot ROM (on the HPS side) sees the flagged ready signal it continues to read and execute the initial HPS program from the FPGA RAM. Note, it has to read/execute over the HPS-to-FPGA bridge because the FPGA RAM is on the FPGA side. When the program executes, it is able to configure the HPS, enabling it to read more code from the flash and use the DDR-3 SD-RAM (1GB) to continue booting. Note, some documents may reference the FPGA embedded memory as OCRAM, which is easily assumed to be the HPS OCRAM - but that is an entirely different memory (RAM in the HPS), their wording should be FPGA OCRAM.
Boot from QSPI/NAND flash
The DE10-Nano kit does not have these on the board.
Boot from SD card flash
The boot ROM can boot from a micro SD card - a card inserted in the micro SD card slot. This is the preferred option, and we will setup and build in this guide.
Script automation
My second "Hello, World!" example includes scripts (GNU makefiles and shell scripts) for automating the build process.
The scripts will build the bare-metal sources, convert the elf program to binary, and generate the SD card image with U-Boot. The SD card image boots U-Boot and then a U-Boot script will execute the "Hello, World!" binary program.
The script can also optionally build the U-Boot source files (requires linux), the default is to use the included precompiled U-Boot files.
Requirements and limitations
GNU make limitations
Does not support spaces in paths and filenames.
Windows limitations (solved by WSL2)
- Natively supports building the C/C++ sources into elf, bin or uimg
- Natively does not support building the SD card image and U-Boot, for these use WSL2, Cygwin or MSYS2
WSL limitations (solved by Windows)
Currently, does not natively support USB connections, so we are unable to use the JTAG (USB Blaster II) or the UART within WSL, but that is not a problem. Building the SD card image does not require the JTAG, but for running target programs we may need to see UART messages, for that we can use Windows.
The SD card image build requires the Linux loopback device support, WSL1 doesn't support it and cannot be used, you need to use the newer WSL2 which fully supports the loopback device.
Bare-metal C build requirements
- GNU make
- GCC ARM cross compiler toolchain
On Windows if you want to build natively with GNU make, the xPack's build tools contains a very good port of it, which also includes with it the sh (BusyBox shell) - this provides make with the built-in shell facilities such as cp, rm, mkdir, ls, etc.
My makefile build requirements for U-Boot preparation
- unzip
U-Boot's own build requirements on a fresh Ubuntu 22.04.3 LTS distro:
- GNU make
- GCC ARM cross compiler toolchain (for building target U-Boot)
- gcc (for building host tools)
- bison
- flex
- libssl-dev
- bc
- libgnutls28-dev
SD card image script build requirements
- If using my script: Bash, mkfs, dd, sfdisk, losetup, mount, umount
- If using Altera's script: Python 3, mkfs, dd, fdisk, losetup, mount, umount
1. Preparations
In this guide we will be working on Windows with WSL2 running Ubuntu.
| 1.1. Creating a working folder and downloading |
|---|
|
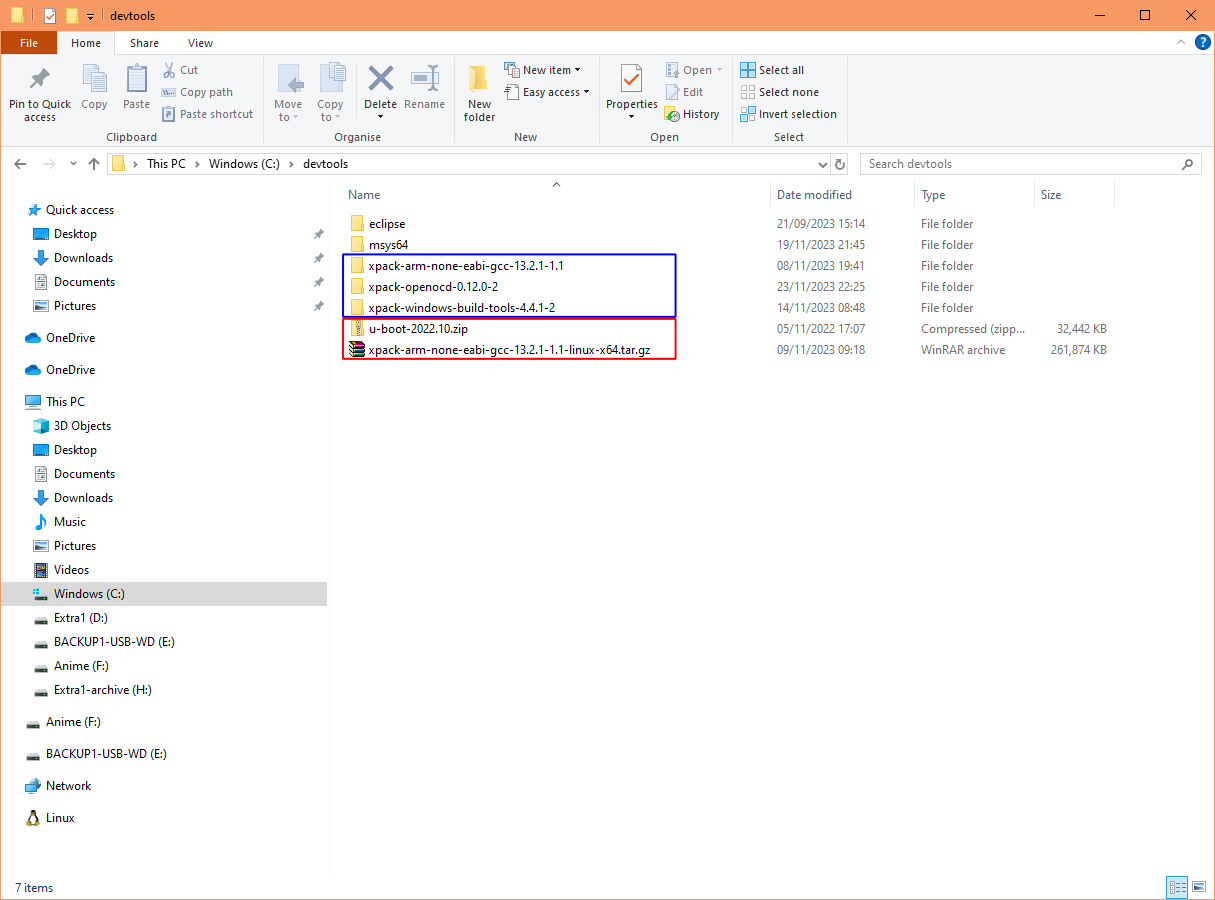
Using File Explorer, create a suitable working folder, for example C:\devtools. Choosing a lowercase name makes it easier to type into WSL2. Next, download the below files and place them into the C:\devtools folder. Files to download:
Note, Altera's BSP generator (Python scripts) for converting Quartus Prime HPS handoff files can be found in their fork, for example: cv_bsp_generator. Your C:\devtools folder should contain the 2 files shown in red for the WSL to extract. Blue = extracted files, red = compressed file. If you plan on building the bare-metal sources and debugging under Windows you should also have the other 3 tools as shown in blue, see my bare-metal guide for details: If you want to use other tool/software versions then you will need to edit the environment files located in the scripts-env folder. |
| 1.2. Downloading the "Hello, World!" source code |
|---|
|
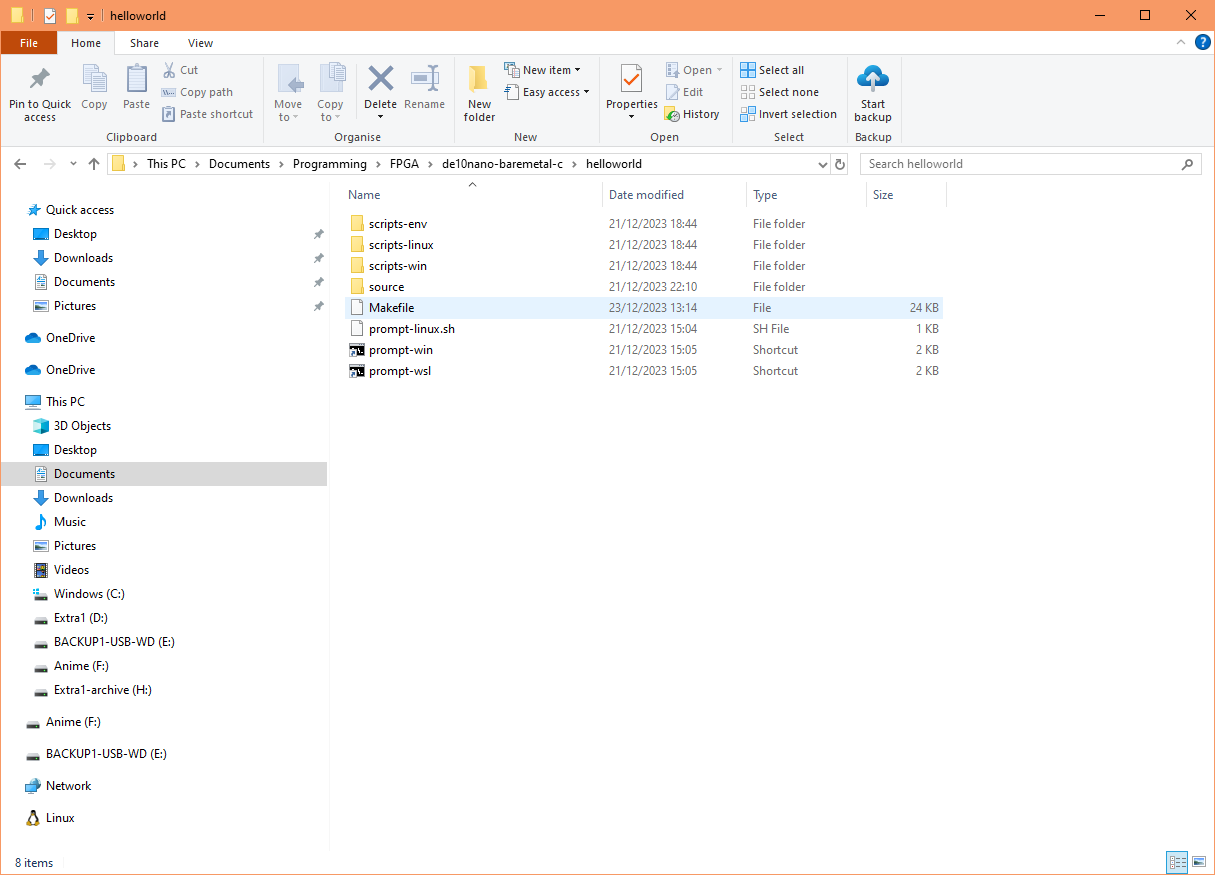
This is my second "Hello, World!" example but this includes automated build scripts. For convenience, most of the script settings are stored in the "scripts-env" folder. In the root folder are click-able prompt files and shortcuts, these auto-run the environment script. Get the example from my truhy github (click Code, then download ZIP), and extract it to a folder of your choice, ensure there are no spaces in your paths. |
| 1.3. Installing WSL2 with Ubuntu |
|---|
|
Skip this if you have already WSL2 installed. If not, then open a PowerShell or a Windows Command Prompt in administrator mode, enter this command, then restart Windows: wsl --install
The default installs the latest Ubuntu in WSL2. This guide is useful if you want to know the details: How to install Linux on Windows with WSL2 |
| 1.4. Preparing WSL2 |
|---|
|
You only need to do this once. To start WSL2, you need to open a PowerShell or a Windows Command Prompt and enter: wsl
We will prepare WSL2. The following creates a devtools folder, copies U-Boot source zip and extracts the GCC Arm toolchain:
mkdir ~/devtools
We also need to download and install various other commandline based tools. Enter in these commands:
sudo apt install make
You may now close the WSL2 prompt window. We will re-open it using a shortcut in the next step. |
| 1.5. Building the SD card image in WSL2 |
|---|
|
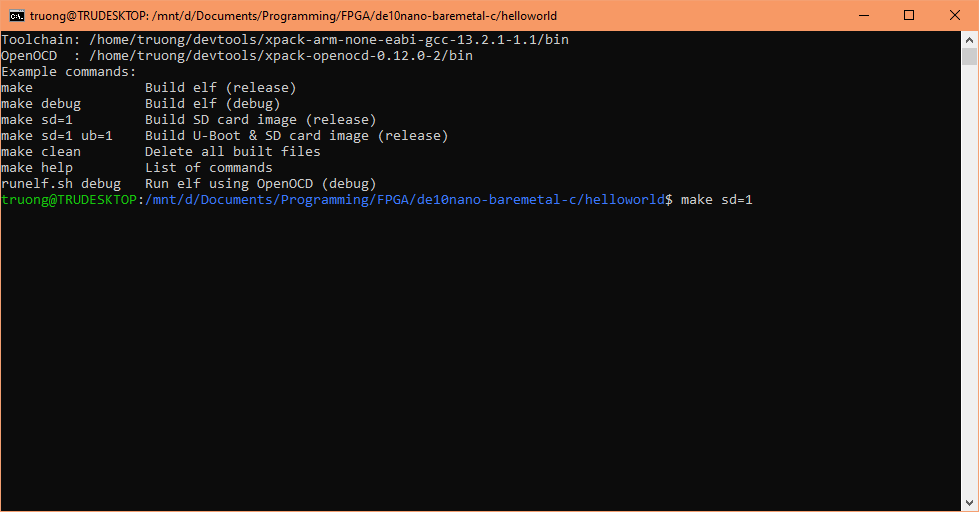
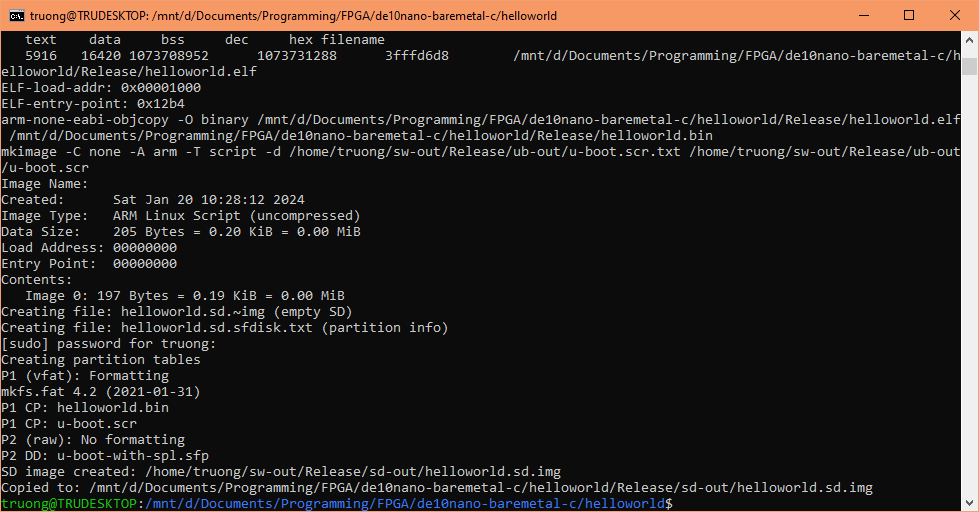
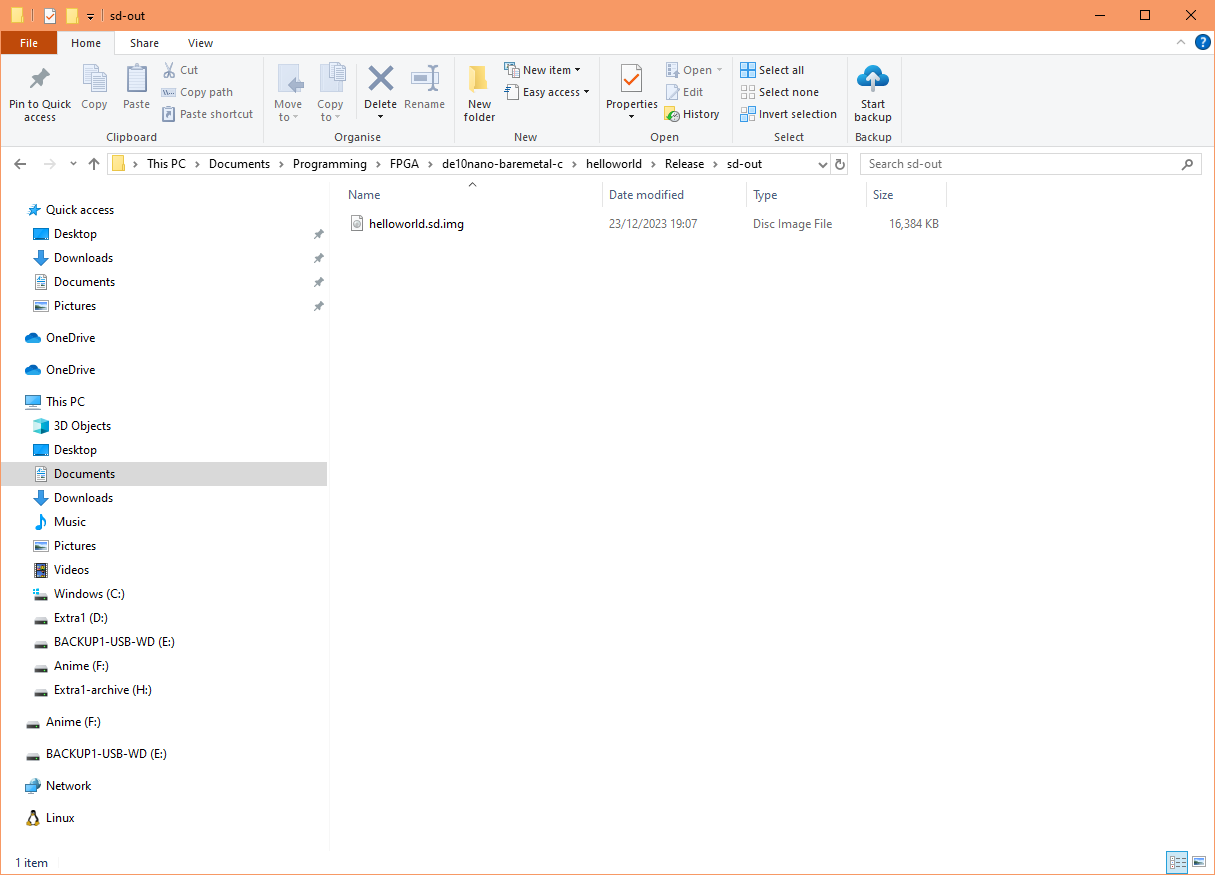
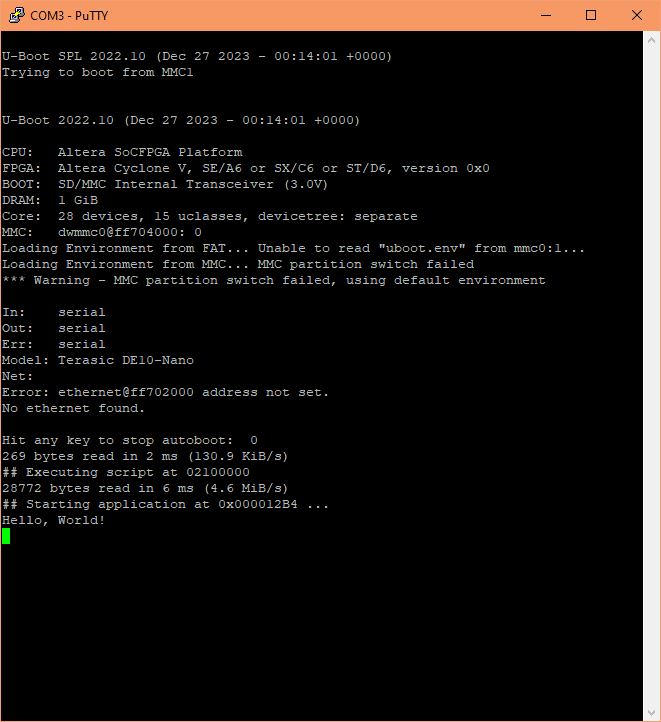
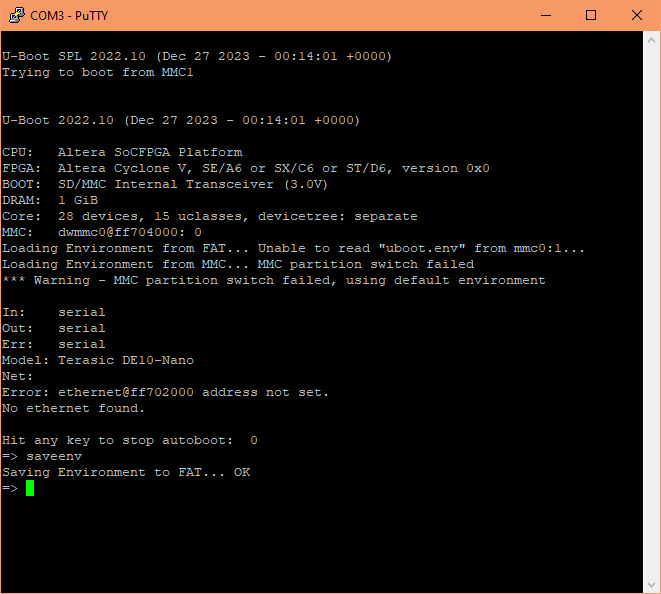
We are ready to run my build script. In File Explorer, go to the "Hello, World!" folder and double-click the shortcut named "prompt-wsl". This will start a WSL2 prompt and also sets up the environment variables needed by the scripts. Note, the environment settings are defaulted with the versions used in this guide, for other settings you will need to edit the settings files located in the "scripts-env" folder. In WSL2 simply enter this command to start the build: make sd=1
The SD card image build require higher permissions, so during the build it may prompt for an admin password. After a successful build, the last line outputs the location of the SD card image. In File Explorer go to your "Hello, World!" folder, the build produced the Release folder, and is where a copy of the SD card image can be found: Using an image writing tool such as Rufus, write the image to an SD card. Connect the UART port to your PC, start a serial terminal program such as PuTTY and connect to the correct COM port with 115200-8-N-1 no flow control, apply power to the DE10-Nano board. It should boot and execute the "Hello, World!" program. The output messages should appear in PuTTY: You may have noticed, at the top there is loading environment error, unfortunately, U-Boot does not create an initial uboot.env file for us. To create one in the U-Boot console (PuTTY in this guide), reboot, press any key to stop autoboot, then enter: saveenv
|
| 1.6. Cleaning up |
|---|
|
To remove all of the built files, enter in this command: make clean
|
- Building Bootloader for Cyclone V and Arria 10. A nice guide for building an SD card image from rocketboards.org, but it covers only booting Linux.
- Building the SD Card Image. A very nice guide for building an SD card image from zangman's github, but again covers only booting Linux.
- Intel Cyclone V Hard Processor System Technical Reference Manual. See appendix "A. Booting and Configuration"
- Terasic DE10-Nano kit board information
Document date: Rev 4: 25 Apr 2024 - Updated with newer U-Boot
Document date: Rev 3: 02 Mar 2024 - OCRAM corrected to FPGA embedded memory
Document date: Rev 2: 20 Jan 2024
Document date: Rev 1: 25 Dec 2023
